Today, with everything being online and virtual (even meetings, thanks to videoconferencing platforms), the paperwork we used to use has drastically decreased. However, it still exists and needs to be preserved digitally. But we are in the era of the famous paperless. That is, we are replacing a great part of the physical routine with new technologies. In this way, we are printing less, using fewer note pads, and even more, we are using digital signatures in contracts and documents much more. The best way to preserve these documents is to scan them and save them to your hard drive or cloud storage and to do this you need a multifunction printer. However, these devices can be confusing to set up and use. They often require different applications and drivers, even if you are using other models from the same manufacturer. We’ve set aside some tips on how you can easily scan your documents on both Windows and Mac.
Scan in Windows
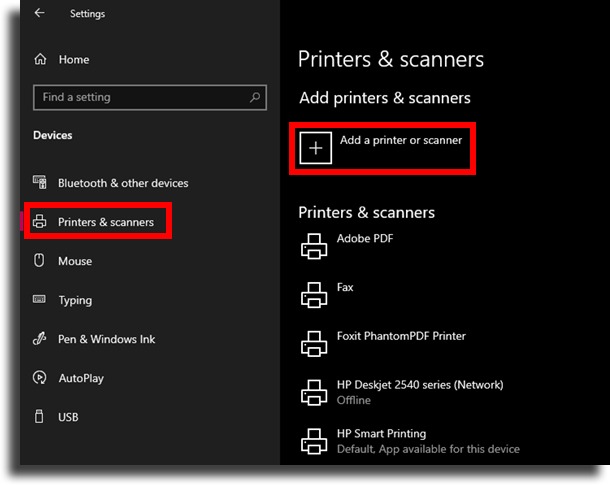
Firstly, as a Windows user, your computer will automatically detect your device once connected through the USB port. If your printer is a wireless or network device, Windows will automatically detect it if it’s already connected to your network or your computer’s Bluetooth connection. However, if your computer does not detect it, you will have to configure the machine manually. See how to proceed to scan:
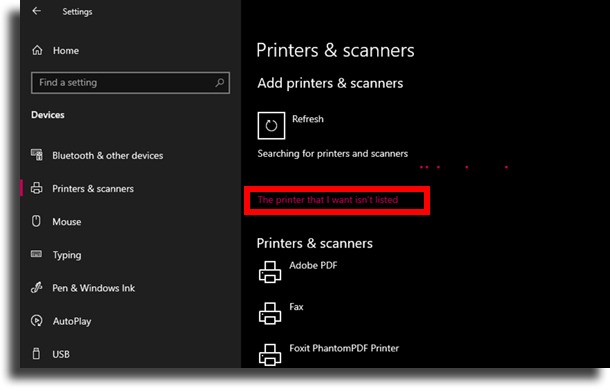
When your computer detects all nearby devices, select the one you want to use and click Add Device. It will then automatically add your machine, and you can choose it from your scanning options later. However, if it doesn’t, click on the “The printer I want isn’t listed” option.
Windows will then open a wizard to add your printer. Just follow the instructions to install your device. Once the hardware is added, you can open the applications to start your scanning. Windows offers two ways to scan documents; the first is the legacy Windows Fax and Scan application, and the second is the newest Windows Scan application. We’ll talk about it next.
Fax and Scan for Windows
A lot of people don’t know, but Windows comes with a management program so you can send and receive faxes, as well as scan from any printer without the need for third-party programs. Let’s teach you what you need to do to run this program:
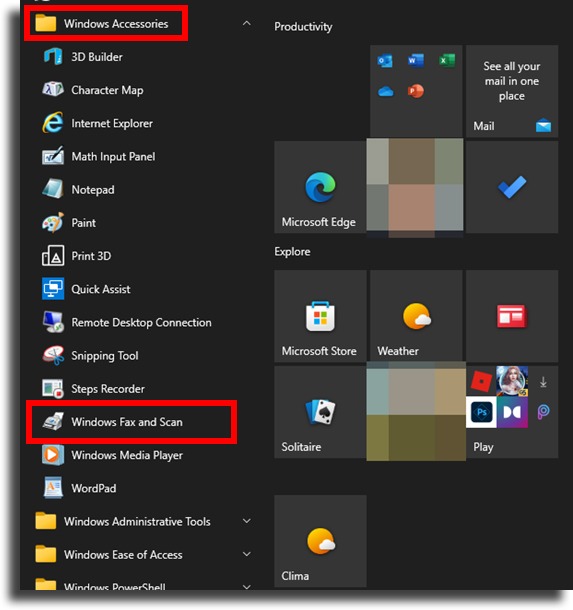
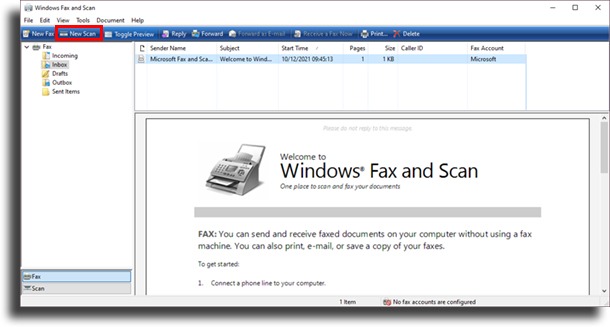
Click Start; Go to Windows Accessories > Windows Fax and Scan to access the application; In the Windows Fax and Scan window, select New Scan.
Make sure you have chosen the correct device, otherwise click Change to choose. Once you’ve chosen your device and configured your scan settings, click “Preview” to start scanning and see how your document will look. If everything is OK, click Scan to scan and save the image. Files with images are normally saved in the Documents > Scanned Documents folder, but you can define another location if you wish.
Scan with Windows Scan
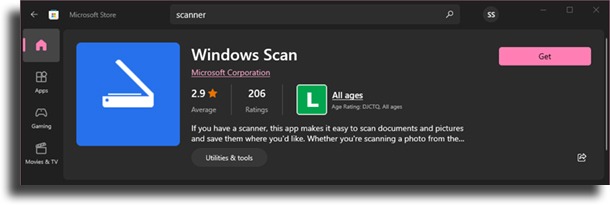
First of all, this application is not normally pre-installed on Windows. If you cannot find it on your computer, you will need to download it from the Microsoft Store by following the steps below:
From the Start menu, click on “Microsoft Store”; Click on the search bar and type “Scanner; “Windows Scanner” should be the first result that appears in the drop-down menu – click on it; On the next page, click the “Get” button and Windows Scanner will start downloading automatically; Once the download is complete, click “Start” to open the application.
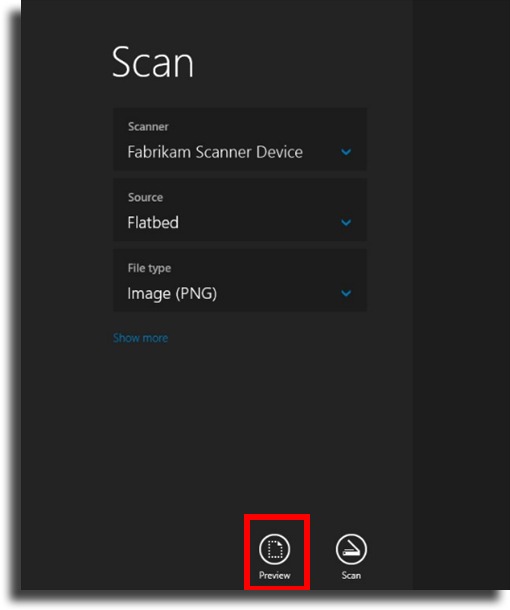
A new Scan window will appear. If you have multiple scanners, choose the correct device, select the type of file you want to save, such as PDF, and then press “Preview”.
You will then see your image in the main window, and you can adjust the edges of your file by dragging and dropping the white circles in the corners of your file. Once the settings are finished, click on SCAN and then on SHOW.
After scanning your file, the application will show a pop-up at the top right of the window telling you the file name and where it is saved. Click VIEW to open the file in a photo app, or press CLOSE when done. You can access the file saved in your Pictures > Scanner folder.
Scanning on a Mac
You can also scan from any printer to your Apple computer. First, go to System Preferences > Printers and Scanners to check if your all-in-one printer is installed on your system. You should see it listed in the left column, otherwise, you need to add it.
How to add your printer
Follow the steps below to add your printer: Click on the + sign. An Add Printer window will appear. If you are using a USB printer, it should automatically appear listed in this window. But if you are using a network printer, you should click on the IP icon and configure it using its network address. However, if your device is still not found in the Add Printer window, you will need to visit your printer’s brand website and download the respective drivers.
Starting your scan
Once your device is installed on your Mac, go back to Printers & Scanners to start the scan from any printer you’ve set up. Select the device you want to use, then click the Scan tab. You should see the name of your device in the main window, then below that click on the Open Scanner button. A Scanner window will open and on the bottom bar, select the folder where you want to save your scanned file, choose the paper size of your document, and press Scan. The printer will first perform a preliminary scan to determine the documents it is working with. It will then scan each document it detects and save it as a separate file. To find the file you recently scanned, go to the folder you selected in the previous paragraph.
Benefits of Document Scanning
It is a fact that digitalization brings a number of benefits, including the ease of finding and manipulating documents. This is for both business and personal use. Here are some of the most relevant benefits:
1. Security and preservation
First of all, every printed document is subject to the risk of loss or misplacement. In this case, when scanning, you have more security, as it allows both the creation of copies of documents and the improvement in their access. In addition, virtual documents are also better protected against disasters such as fire or flood.
2. Cost reduction
Scanning is a cost-cutting solution because when we talk about physical space, the safekeeping of documents can be felt in the company’s pocket. When we consider the expenses with the maintenance of the physical space of the files, this is the best solution from a financial point of view.
3. Agility in processing
In various situations, when scanning, it eliminates the delivery time, whether when sending a document by mail or courier. In addition to keeping documents, its function is also to optimize processes at different levels.
Did you like our tips on how to scan from any printer to your computer?
Do you often scan on Windows or Mac? Tell us in the comments if this article helped you, and come check out the best Windows command prompt tricks as well as how to use macOS recovery mode!